Prerequisite: You must have at least once use Create-react-app(CRA) and curiosity to learn!🤗
So the story has 2 characters i.e you and me (Payal)!
Me: Before jumping to learn webpack let's learn first about bundling and dependency graph 😀
You: Okay😏 but a small introduction payal 😠
Me: cool 😅
What is a bundle?
A bundle is a file that contains the final version of source files that are already compiled and loaded

What is a Dependency Graph?
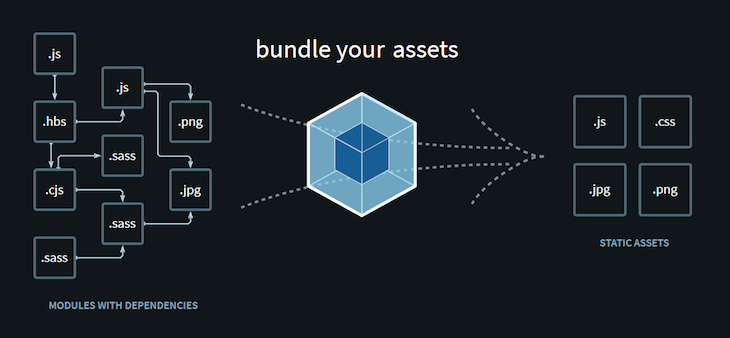
Whenever a file depends on another file or a module webpack treats this as a dependency. So when webpack process your application from starting point till the end, it creates a dependency graph.

Me: Let's start now webpack 🙃
You: Yes 😆
What is Webpack?
Webpack is a static module bundler for modern JavaScript applications. And when it processes your application it creates a dependency graph!
So it has 5 core concepts:-
- Entry
- Output
- Loaders
- Plugins
- Mode
Entry
You define the entry point in webpack.config.js i.e from where webpack should start building the dependency graph.
For example, My entry point is src/index.js where src=folder and index.js=file
entry: path.resolve(__dirname, "src", "index.js"),
Output
The output tells 2 things i.e where to keep bundled file and what it should be named.
For example, the bundled file is kept in dist folder and the filename should be main.js
output: {
        filename: "main.js",
        path: path.resolve(__dirname, "dist")
    },
Loaders
Webpack understands only javascript and JSON files.
So, How to process other files like .jsx, .css, .ts? Think ...
You: Let's think now!  Me: Hang on! We have loaders for it! I'll explain 😊
So for example, you want to process .css files, so we need css-loader
You can install that as npm install --save-dev css-loader and start using in webpack.config.js and the same can be done for .ts files!
i.e
 module: {
    rules: [
      { test: /\.css$/, use: 'css-loader' },
      { test: /\.ts$/, use: 'ts-loader' },
    ],
  },
Note: For .jsx files we require babel-loader for transpilation!
module: {
        rules: [
            {
                test: /\.js$/,
                exclude: /(node_modules)/,
                use: {
                    loader: "babel-loader",
                    options: {
                        presets: ["@babel/preset-env"]
                    }
                }
            }
        ]
    },
You: So for every different kind of file, we have a different loader?
Me: 
Plugins
The plugin serves the purpose of doing anything else that loader can't do! It extends the capability of webpack.
For example, HtmlWebpackPlugin will generate an HTML file including the main.js file using a script tag! So you add this plugin array in webpack.config.js
 plugins: [
        new HtmlWebpackPlugin({
            title: "Learning Plugins",
            template: path.resolve(__dirname, "src", "index.html")
        })
    ],
Note: There are many plugins which you can explore here
Mode
mode = 'production' | 'development' | 'none'
So mode can take any of the above three.
By default, it is production that produces the minimal size file compared to 'development` and optimize code accordingly!
mode: "production"
Congratulations!
Here are we done with the basics of webpack If you have read it so far, I want to thank you and hope you understood at least some parts of it!

PS: If you find something wrong, please comment out. I would love to correct the same 😄